Introduction
Samsung and LG dishwashers use float switches to help control the water level during the fill cycle. The float switch works with the float assembly inside the dishwasher tub to signal when enough water has entered the appliance.
If the float switch fails, the dishwasher may not fill properly, may overfill, or may stop during operation. Replacing the switch can restore normal water level control and allow the dishwasher to operate correctly.
What This Means
Inside the dishwasher tub is a small float that rises as water enters the appliance. When the water reaches the correct level, the float presses a mechanism connected to the float switch underneath the dishwasher.
The float switch then signals the dishwasher to stop filling with water.
If the switch stops responding to float movement, the dishwasher may misread the water level and fail to operate correctly.
Tools Needed
Most Samsung and LG float switch replacements require only a few basic tools.
Common tools include:
• Phillips screwdriver
• Flashlight
• Needle-nose pliers
• Multimeter (optional for testing)
These tools help access the switch and disconnect the wiring connectors.
Step 1: Disconnect Power
Always disconnect electrical power before beginning the repair.
This can be done by:
• Unplugging the dishwasher from the outlet
• Turning off the dishwasher circuit breaker
Disconnecting power prevents electrical shock during the repair process.
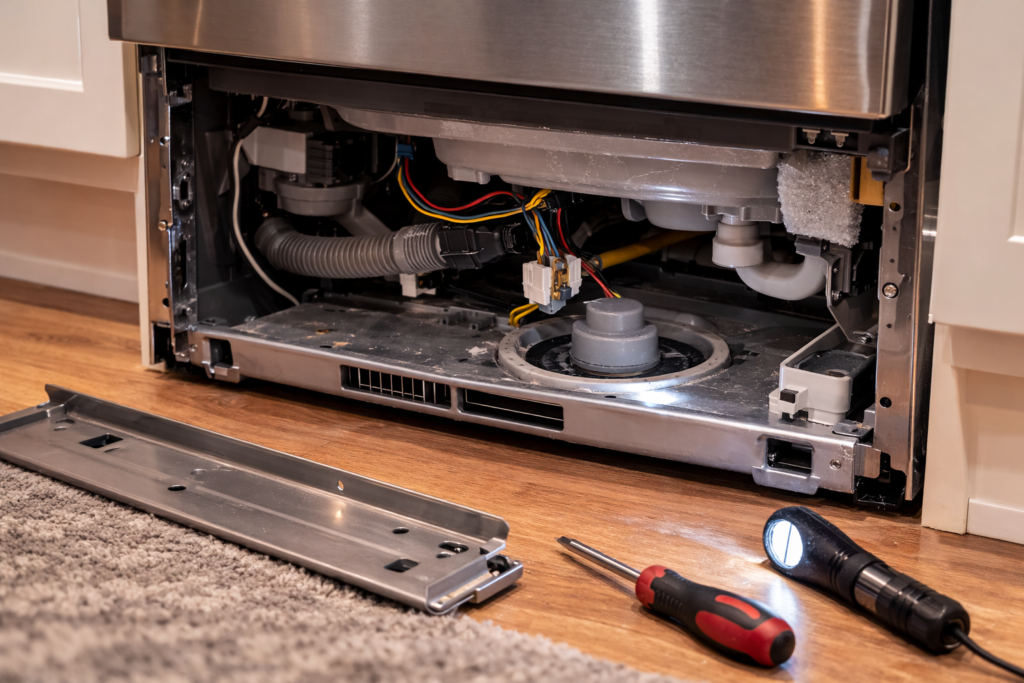
Step 2: Remove the Lower Access Panel
The float switch is located underneath the dishwasher tub.
To reach the switch:
-
Locate the lower access panel at the bottom front of the dishwasher.
-
Remove the screws securing the panel.
-
Pull the panel away to expose the components beneath the dishwasher.
Some models may also include an insulation panel behind the outer cover.
Step 3: Locate the Float Switch
The float switch is mounted underneath the float assembly inside the dishwasher tub.
It is typically a small electrical switch with two wires attached and a small actuator that responds when the float rises.
A flashlight can help identify the component more easily.
Step 4: Disconnect the Wiring
Once the float switch is located, disconnect the electrical connectors attached to the switch terminals.
Pull the connectors gently using pliers if necessary, taking care not to pull on the wires.
This disconnects the switch from the dishwasher wiring.
Step 5: Remove the Old Float Switch
Most float switches are secured using a small mounting screw or a plastic retaining clip.
To remove the switch:
• Remove the mounting screw or release the clip
• Slide the switch out of its bracket
• Note the position of the switch before installing the replacement
Keeping the same orientation ensures the float activates the switch correctly.
Step 6: Install the Replacement Switch
Place the new float switch in the same position as the original.
Then:
• Secure it with the mounting screw or clip
• Reconnect the electrical connectors
• Check that the actuator moves when the float is lifted
Proper alignment ensures the float switch responds correctly during the fill cycle.
Step 7: Reassemble the Dishwasher
After the new switch is installed:
-
Reattach the lower access panel.
-
Tighten the mounting screws.
-
Restore electrical power.
Run a short dishwasher cycle to confirm that the appliance fills and stops filling correctly.
For a full overview of symptoms, testing, location, and replacement, see the Complete Guide to Dishwasher Float Switches.
Related Guides
How to Replace a Dishwasher Float Switch
Whirlpool Dishwasher Float Switch Replacement Guide
GE Dishwasher Float Switch Replacement Guide